Published on: 2024-05-27 (updated on: 2024-12-09). 🔗 Permalink
User certificate setup
This article demonstrates how to set up your certificate in a browser.
Current situation with GÉANT and Sectigo (updated on 2024-12-16)
The DFN has announced that Sectigo has terminated its contractual relationship with the GÉANT consortium due to differences.
On December 13, 2024, DFN announced that a new contractual relationship has been established with the Greek provider HARICA as a transitional solution. More information can be found regularly updated on the DFN pages regarding the current situation and on the services offered by HARICA in particular. We will, of course, accept HARICA certificates for authentication as soon as more information is available.
It is no longer possible to request certificates through Sectigo.
The security of access to our services is not at any time compromised by this changeover. We will inform about further steps through the channels of the coordination office and on this website.
Access protection using mTLS
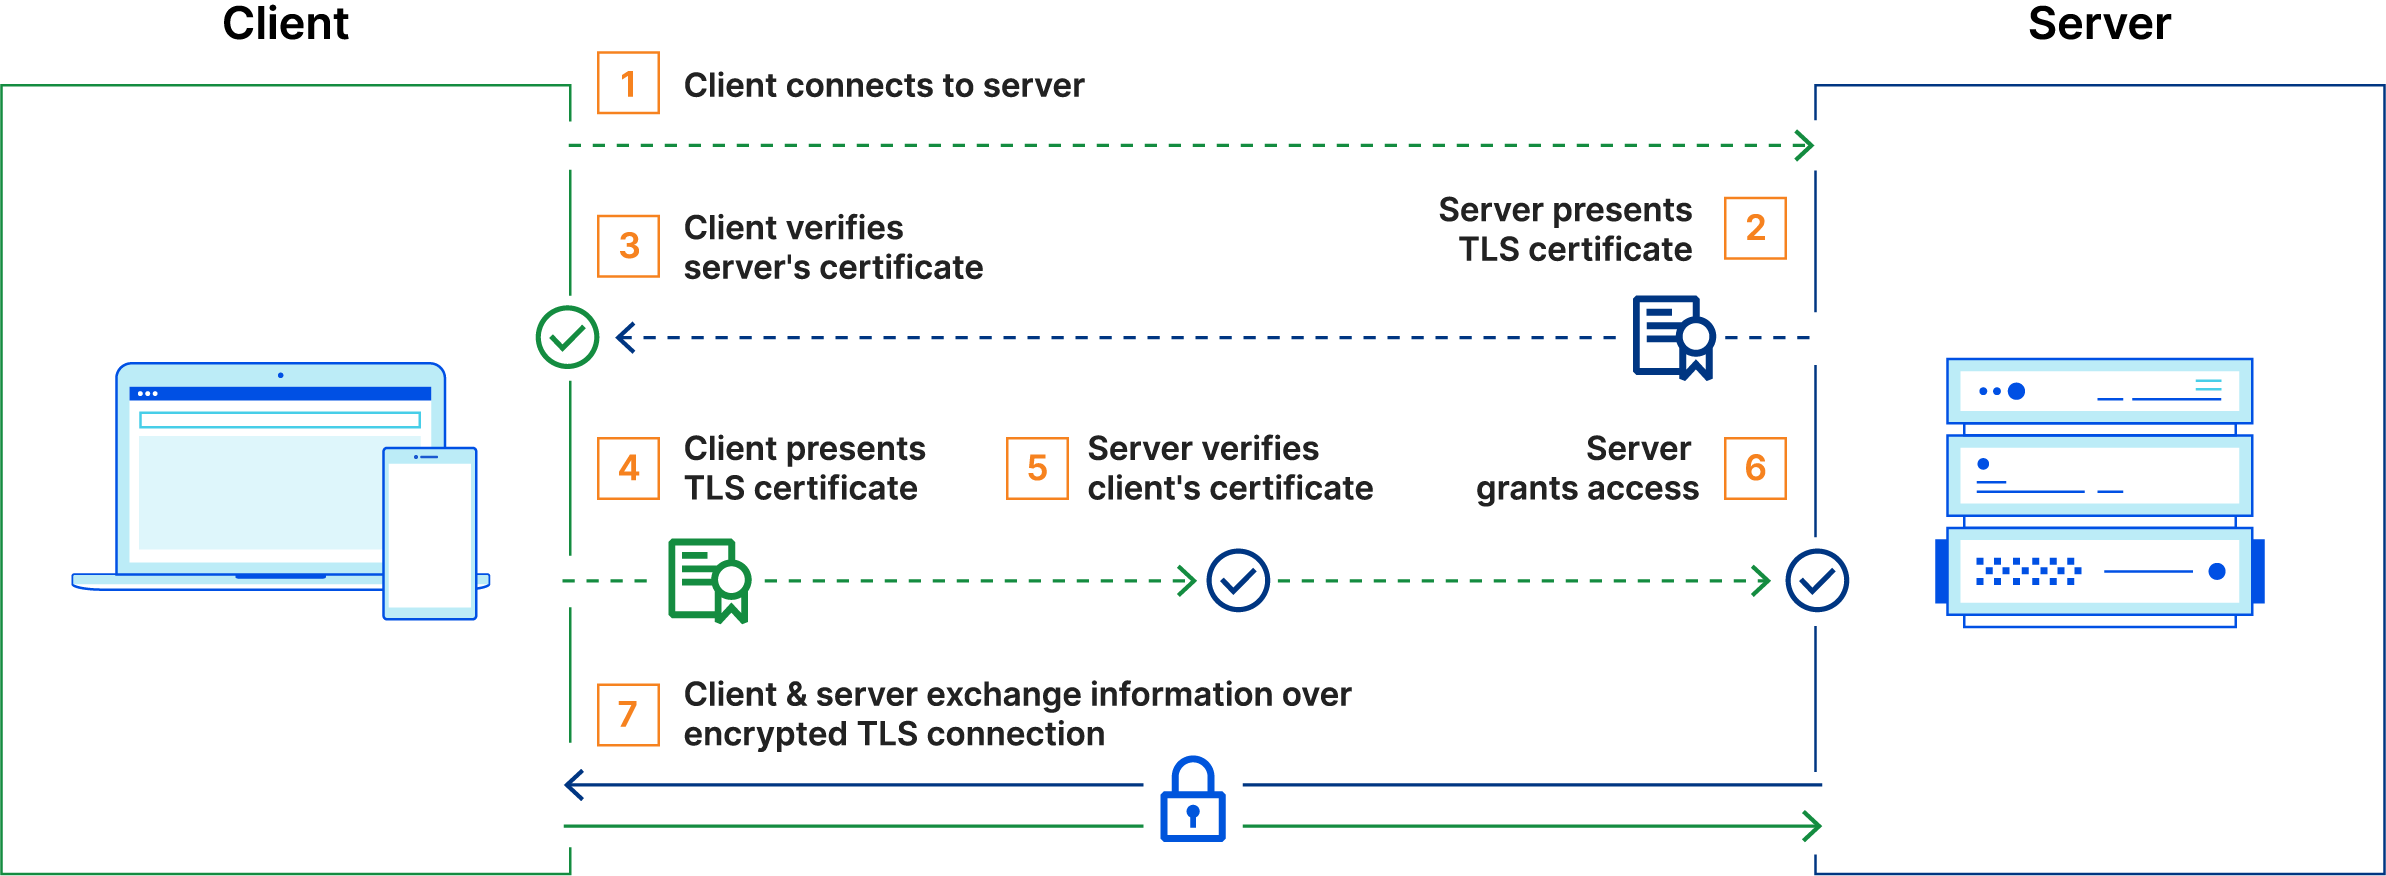
The instance of Ontoserver that is hosted through the SU-TermServ is protected using Mutual TLS. This means that with every access to the endpoint, a mutual certificate exchange takes place, so you need to set up a corresponding certificate on your side and present it with every connection establishment:
As a basis for the setup, of course, a corresponding certificate has to be requested. For this purpose, please refer to the corresponding FAQ entry.
The installation of the certificate in the browser depends on the browser used on the one hand and on the operating system on the other. The user certificate in PKCS#12 format (file extension .p12) is always required.
Mozilla Firefox
Firefox manages certificates itself. The process here is therefore identical for all operating systems.
- Open the Firefox settings.
- Navigate to
Privacy & Security. - Scroll down to
Certificatesin theSecuritysection. You will find this in the lower third of the page. - Click on ‘Show certificates’.
- Select the tab ‘Your certificates’.
- Click on
Import.... - Select the certificate file and enter the password.
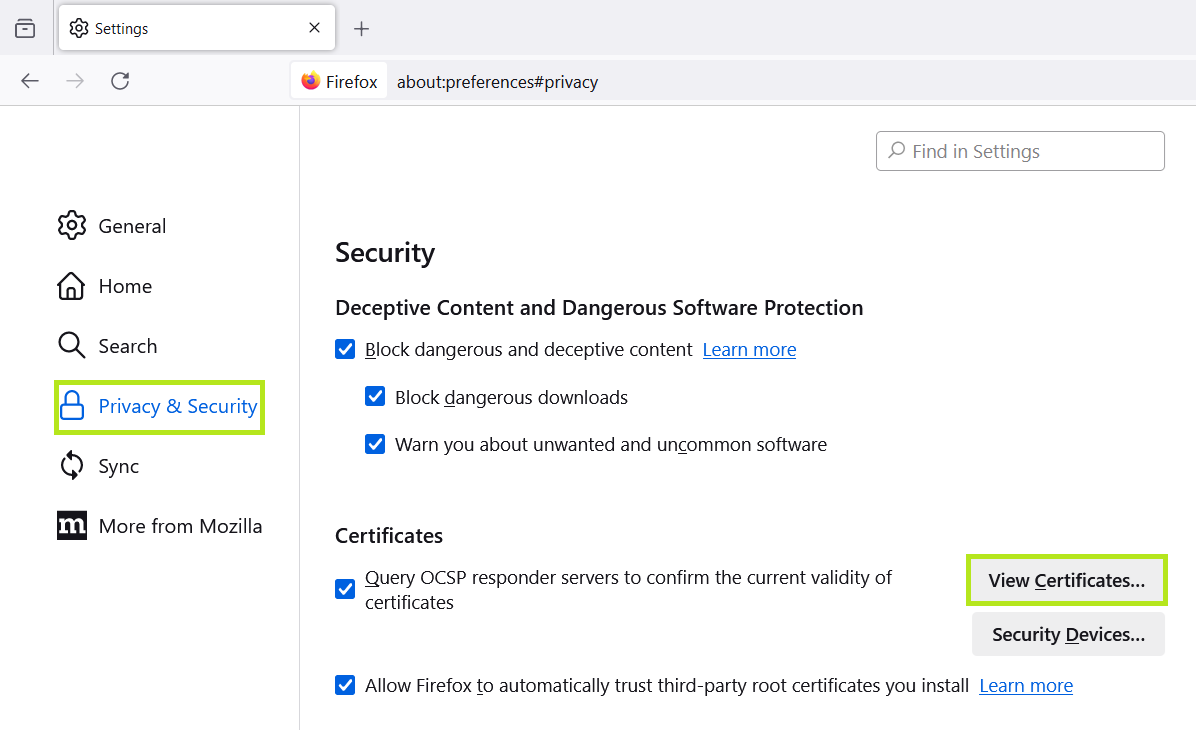
1-3: Find Privacy & Security → Certificate
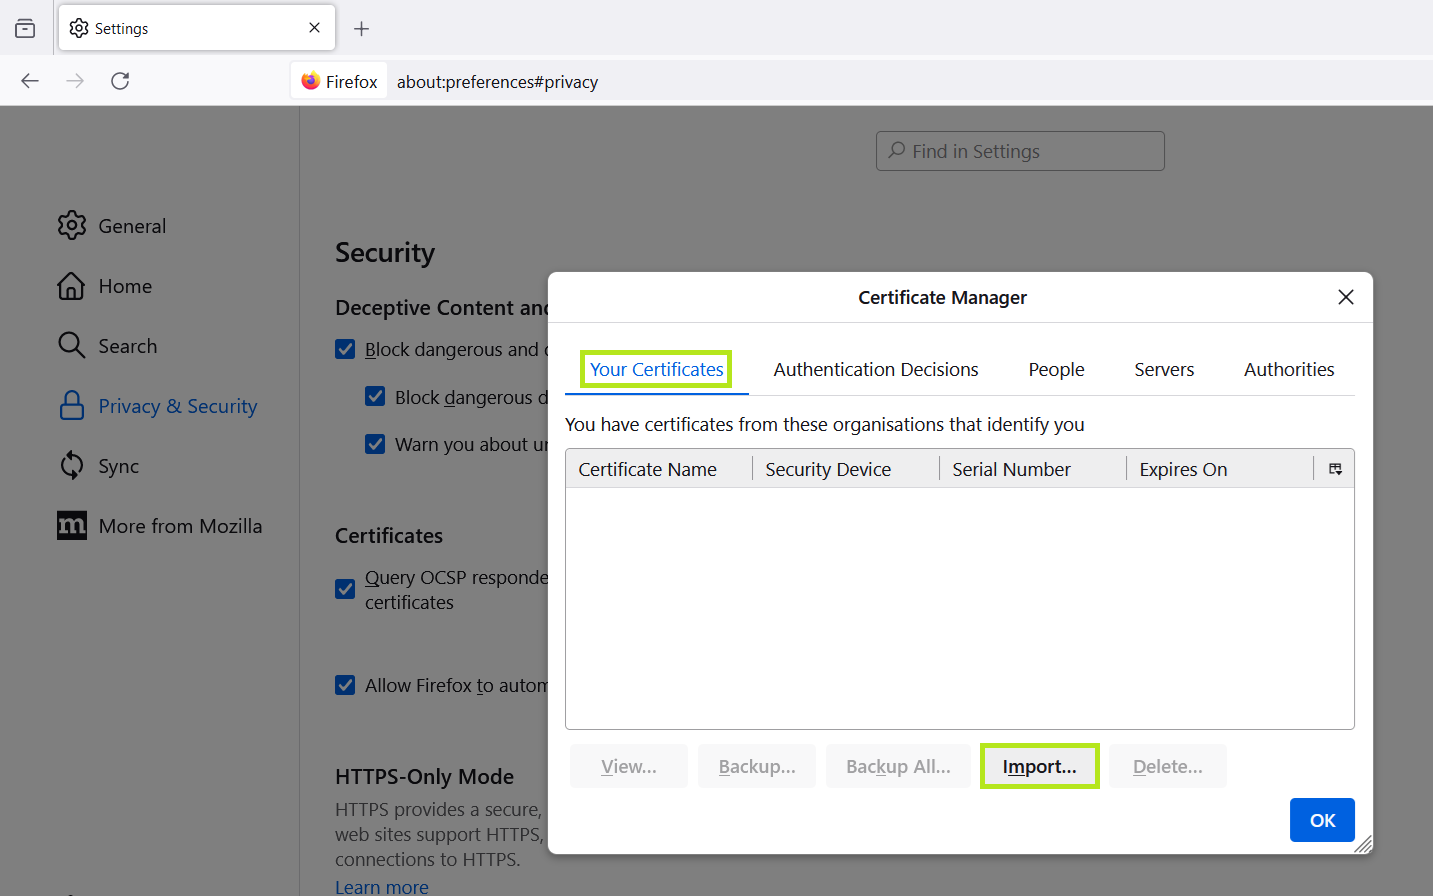
4-5: Import certificate
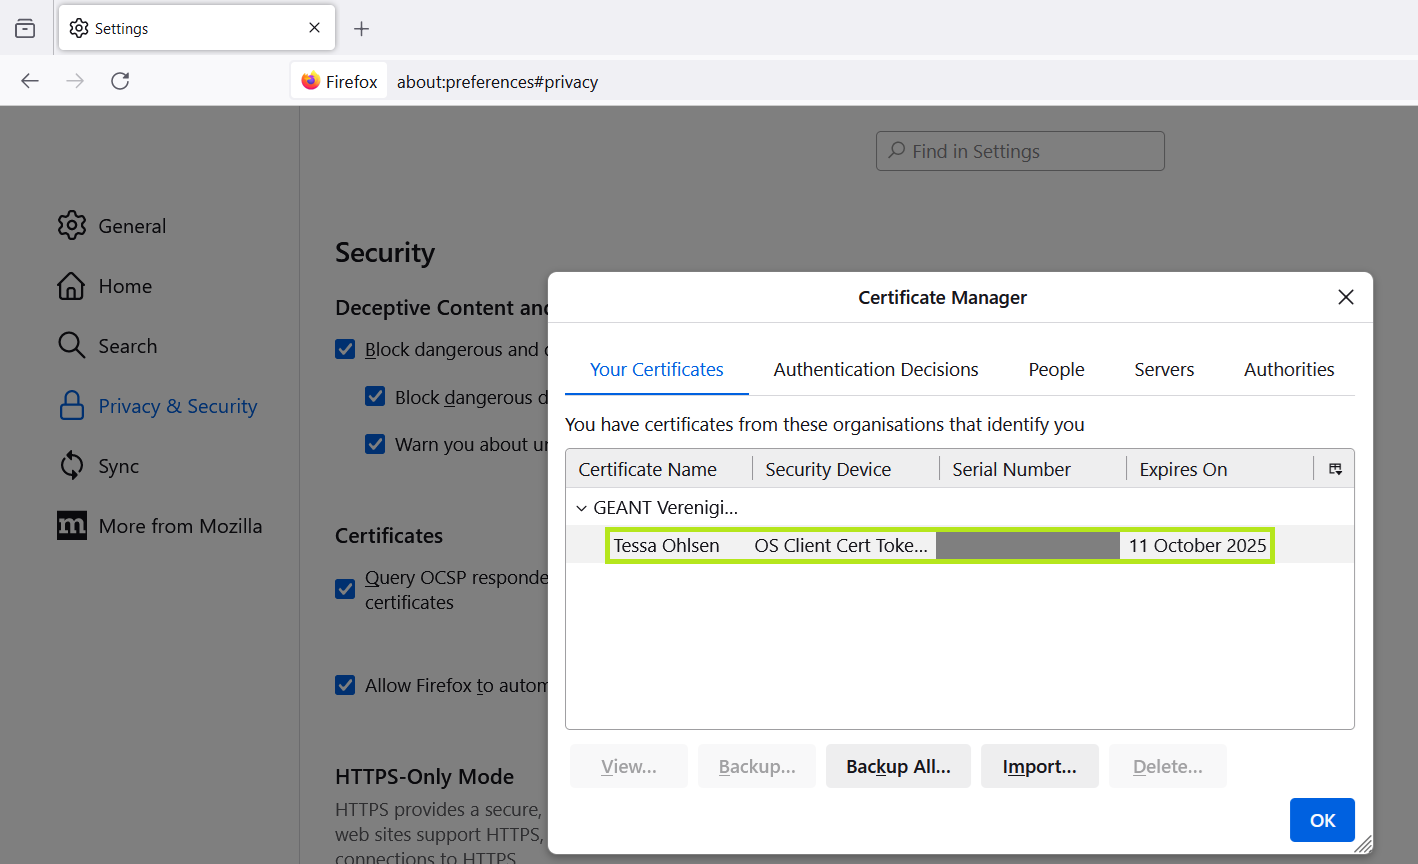
6-7: Dialogue after importing the certificate
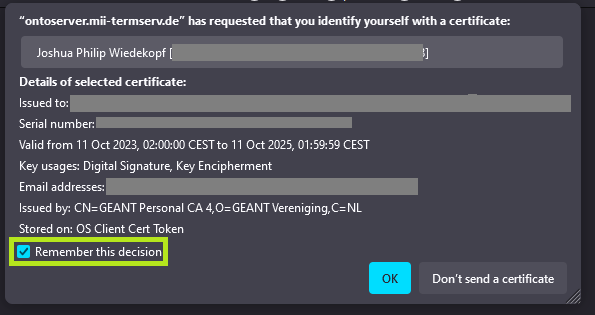
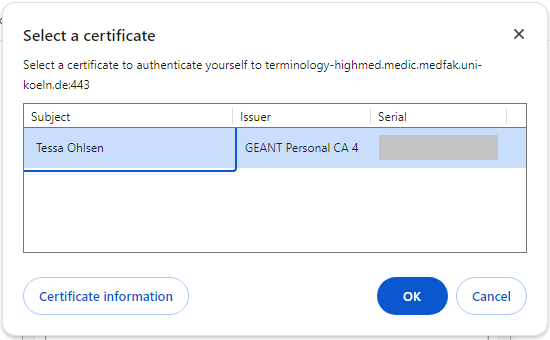
The certificate now appears in the list and you can use it. To test it, call up https://ontoserver.mii-termserv.de/fhir/CodeSystem. A dialogue box will appear requesting which certificate should be used. The default setting ‘Remember this decision’ should be ticked so that you are not asked again each time you access the site:
Google Chrome and related browsers
The following steps must be followed to import a certificate into Chrome and derived browsers like Edge, Opera, Brave, etc., which use the Chromium engine:
- Open the Chrome settings.
- Naviagate to
Privacy and security. - Scroll down to
Security. - Scroll down to
Manage certificatesin theAdvancedsection. - A window opens in which you click on the ‘Import’ button to integrate the certificate.
- You will be navigated through the certificate settings. Among other things, the certificate file is selected here and your password must be entered. Unless otherwise desired, the default settings can be used.
- Certificate has been successfully imported.
Not using Windows?
The below instructions show the import process using Microsoft Windows. Using macOS and Linux distributions, the process is similar, but the certificates that Chrome and related browsers use are administered using the operating system. Please refer to the instructions from Apple or your Linux distribution resp. your desktop environment.
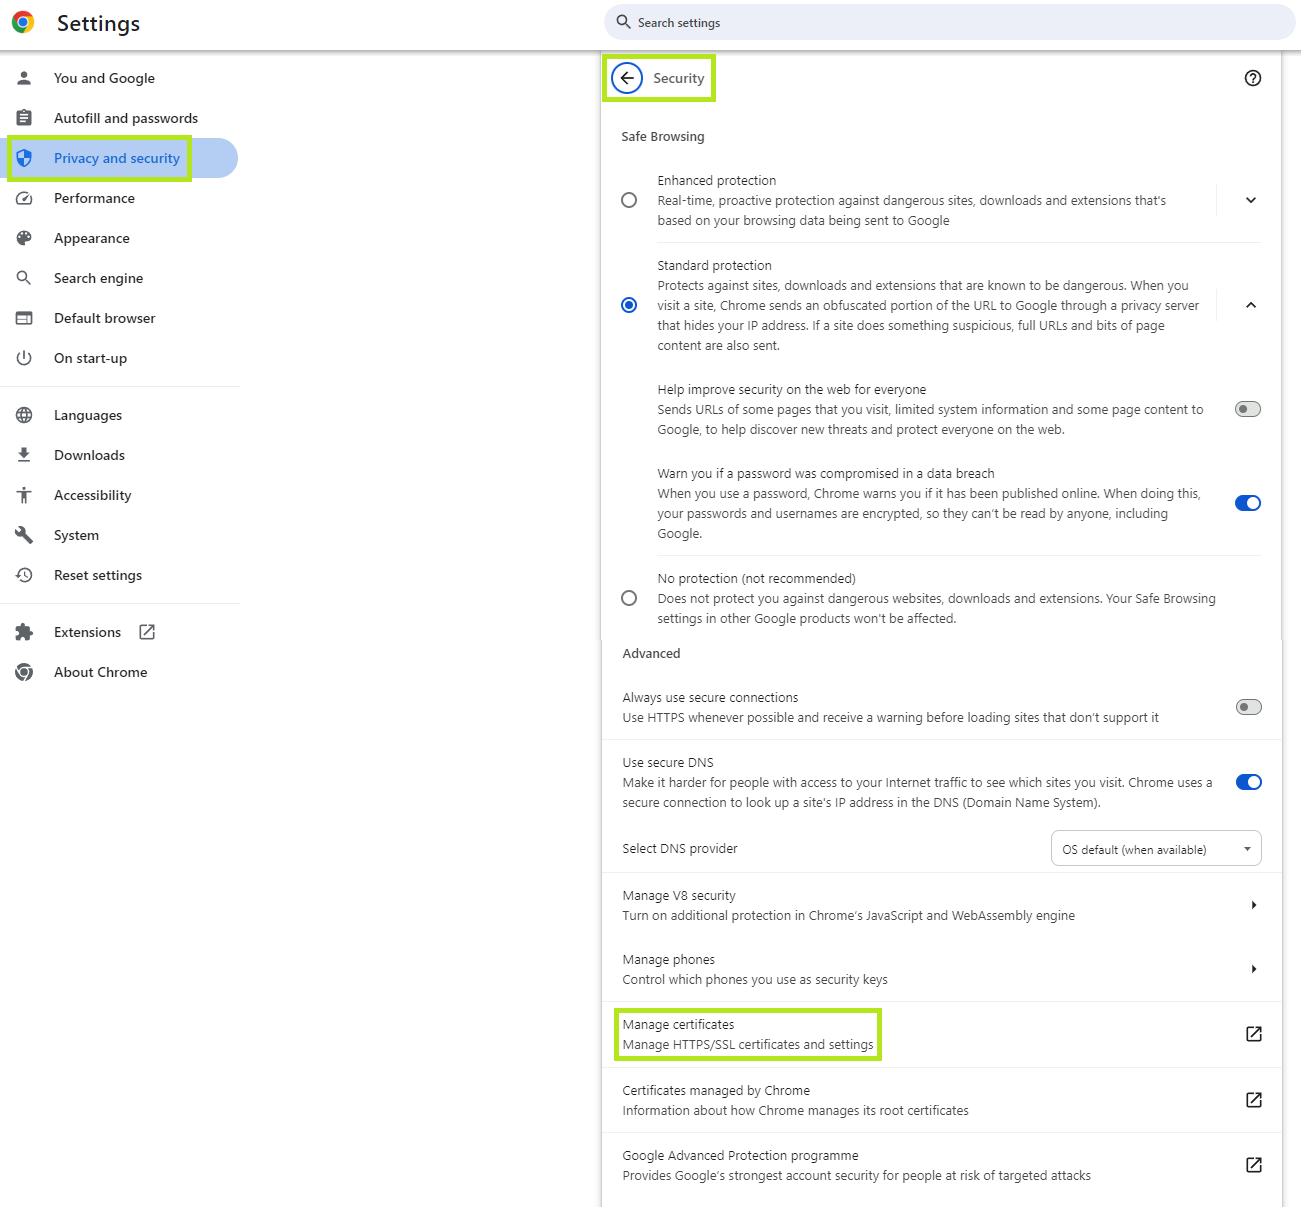
1-4: Find Data protection and security → Security → Manage certificates
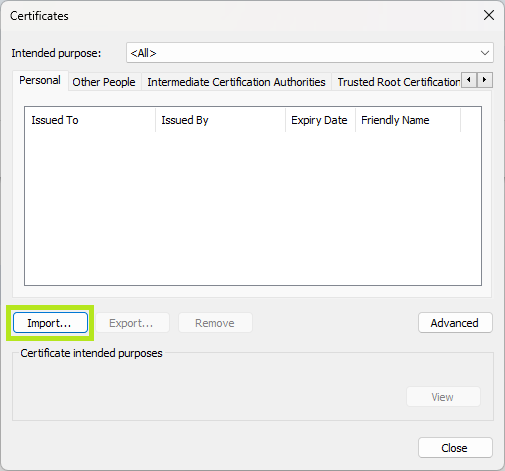
5-6: Import certificate
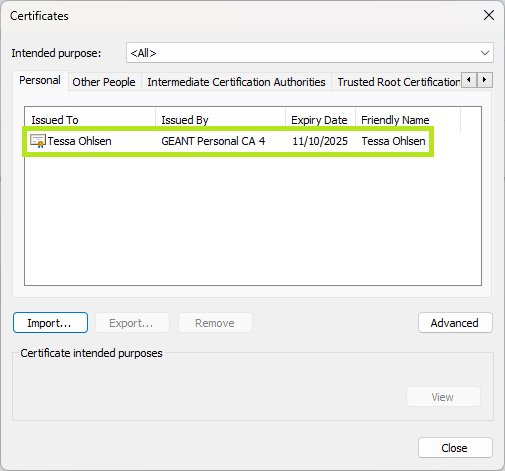
7: Certificate successfully imported
To test, go to https://ontoserver.mii-termserv.de/fhir/CodeSystem. A dialogue box appears asking which certificate should be used:
Postman
In addition to adding a certificate in various browsers, it is also possible to integrate the certificate in Postman. The following steps are necessary for this:
- Open the Postman settings.
- Navigate to
Certificates. - Click on the
Add Certificate...button in theClient certificatessection. - Enter the following URL as the host:
https://*.mii-termserv.de. The port remains empty. - Upload your certificate. This will commonly be a
PFX file. The other two upload functions thus remain empty. - Enter your password in the
Passphraseinput field. - After you have clicked the
Addbutton, your certificate should be successfully imported into Postman.
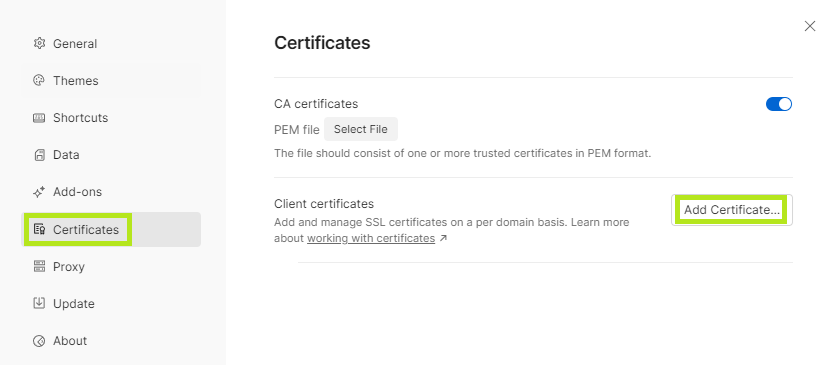
1-3: Find `Certificates` → `Add Certificate...`
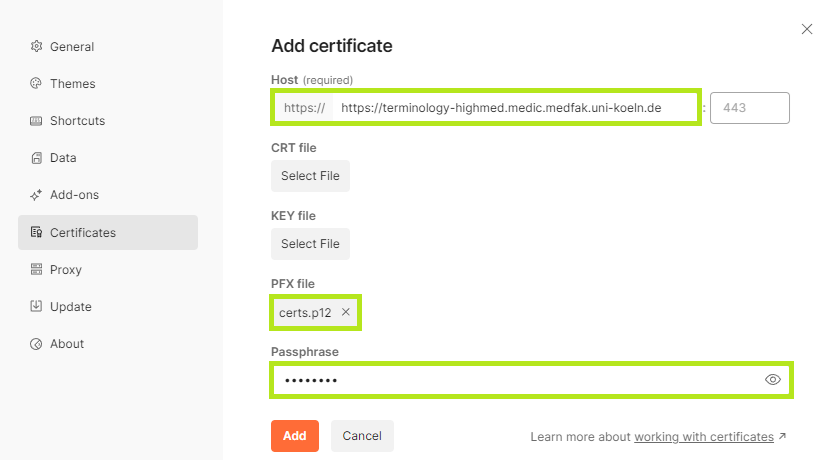
4-7: Import certificate
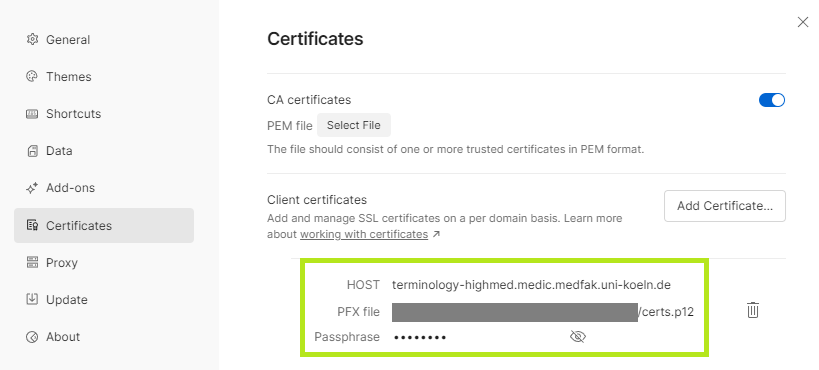
7: Certificate successfully imported
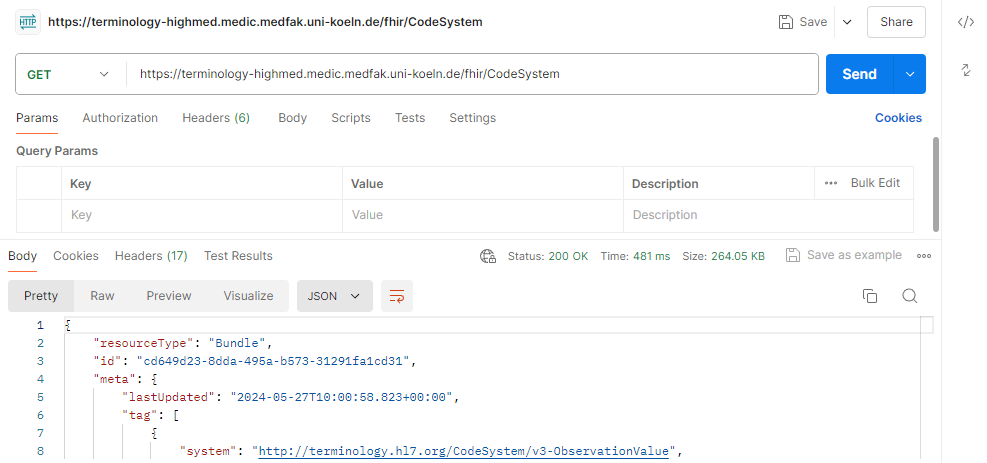
To test, call https://ontoserver.mii-termserv.de/fhir/CodeSystem. Postman automatically accesses the stored certificate, so executing the previous URL should immediately return a bundle with CodeSystems:
